
Financial Statement Analyzer
The Financial Statement Analyzer transforms raw financial data into instant insights. Upload customer statements and our system automatically maps, validates, and analyzes the data to highlight key ratios, trends, and risk signals.
Use it to save time, standardize credit reviews, and monitor financial health across your portfolio.
Note: Public company data is automatically captured and analyzed when available.
Below is a step-by-step guide of how to use our Financial Statement Analyzer.
Pro Tip: Add a financial statement upload field to your digital credit application to collect data upfront and accelerate credit decisions.
Private Company Financials
Step 1: Upload Financial Statement
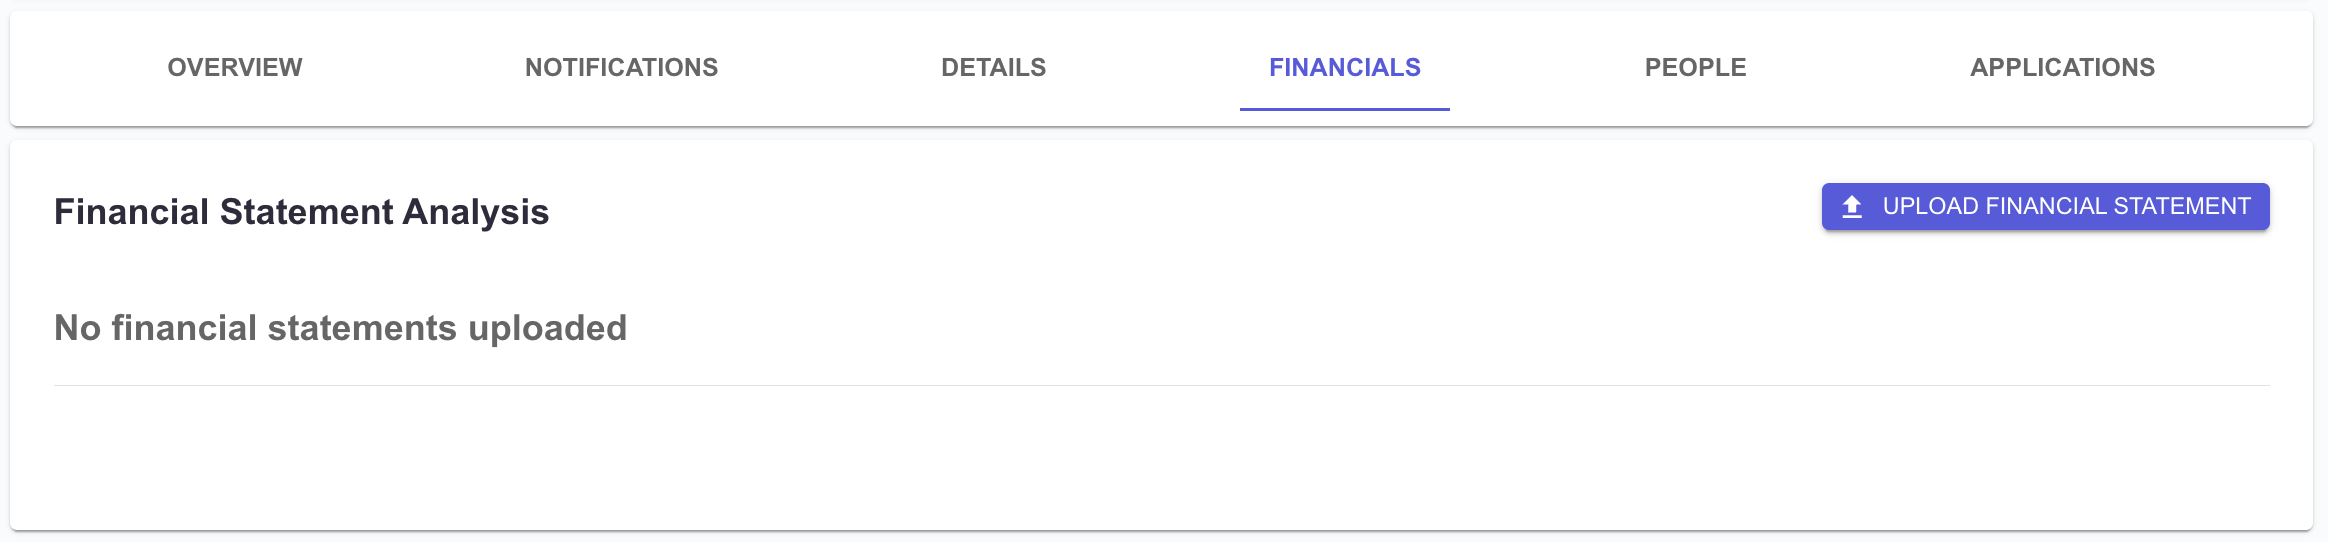
To get started, open a customer's report and select the Financials tab. You'll see the tool to import financial statements listed as the top of the page.
In the Financials tab, click Upload Financial Statement to start.
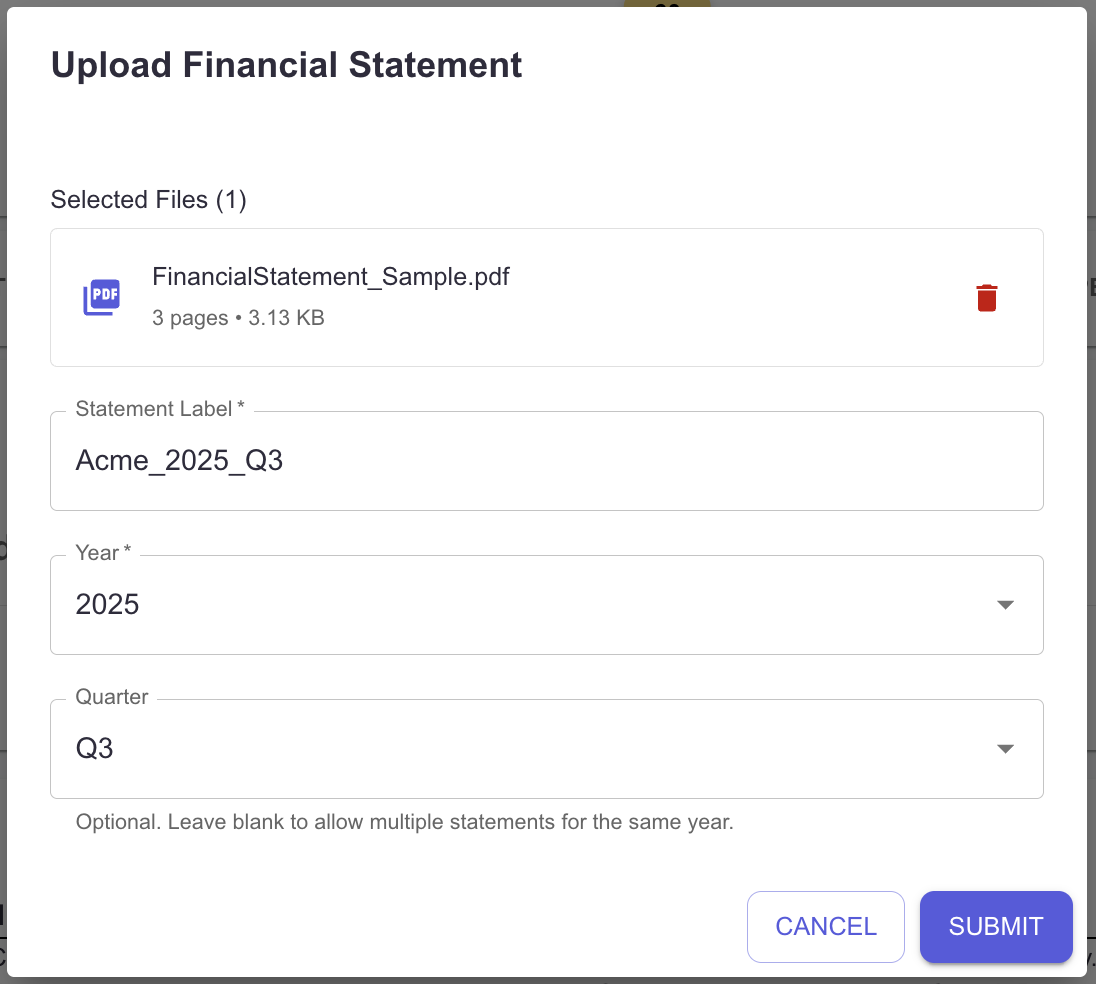
Drag and drop your PDF or select Choose PDF Files from your computer.
Supported Format: PDF only
File Limit: 20 pages per PDF
Required Fields:
Statement Label: Name the file (for example, 2024 Audited Financials).
Year: Select the fiscal year.
Quarter (Optional): Add if not annual; leave blank for multiple statements in the same year.
Click Submit to process. The analyzer will extract and map key financial data automatically.
Pro Tip: Use consistent labels like FY2024 Q1 for easier year-over-year comparison.
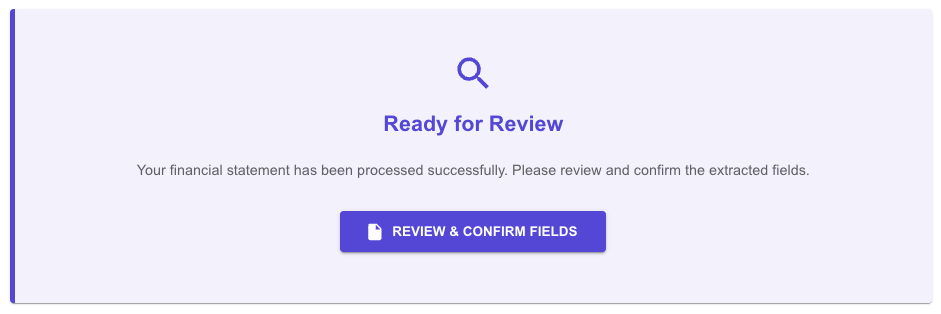
After uploading, your financial statement will begin processing. This usually takes a few minutes depending on file size. You can continue using other areas of the platform during this time.

Once complete, the status box will turn purple and display "Ready for Review". Click Review & Confirm Fields to validate the extracted data before analysis.
Step 2: Review & Confirm Fields
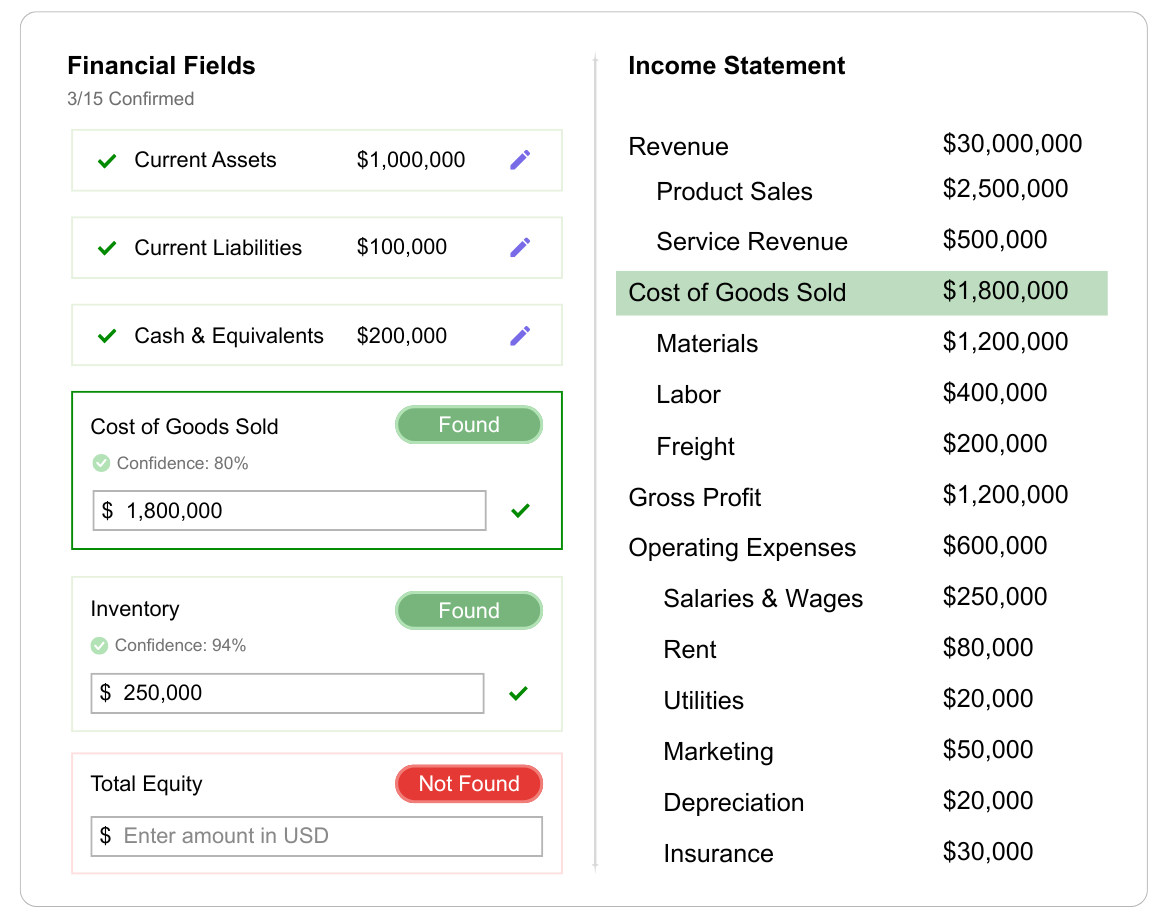
After processing, you’ll be prompted to review each extracted financial field. The system highlights which values were found and where they appear in the document.
Found: Review the amount and confirm if correct.
Not Found: Manually enter the missing value in USD.
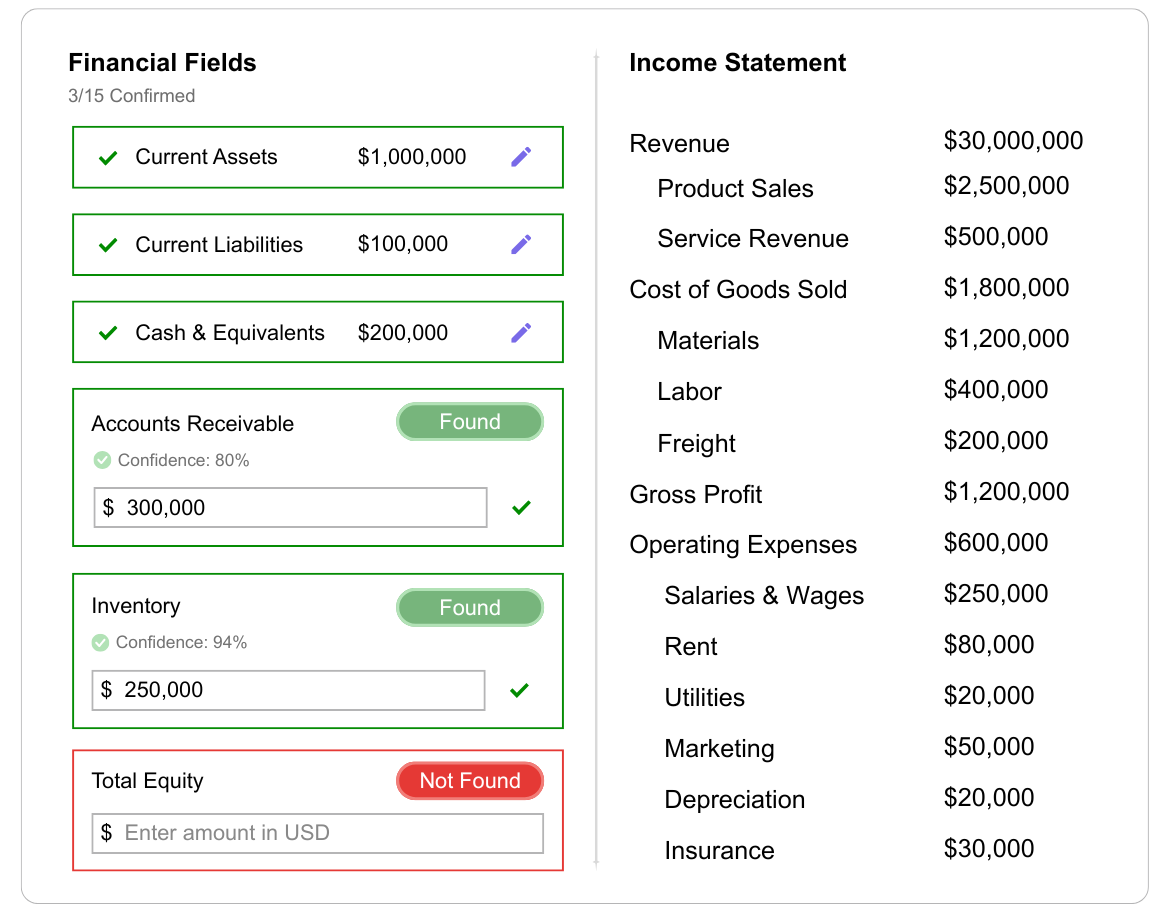
Each data capture includes a Confidence Score that shows how certain the system is about the extracted value. Review each field carefully, update any incorrect or missing data, and click the green checkmark next to each entry once confirmed. As you click on a box to review, the found field will be highloighted in the statement for quick review.
Pro Tip: Double-check missing or low-confidence fields to ensure accuracy before finalizing.
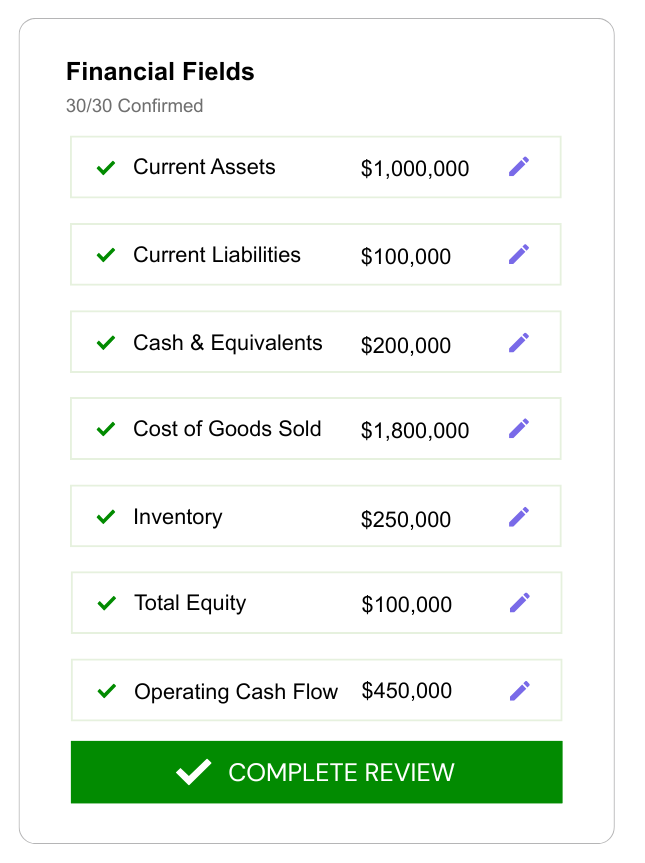
Once all fields have been reviewed, click the green Complete Review button which will appear at the bottom of the list.
Step 3: Review Financial Analysis
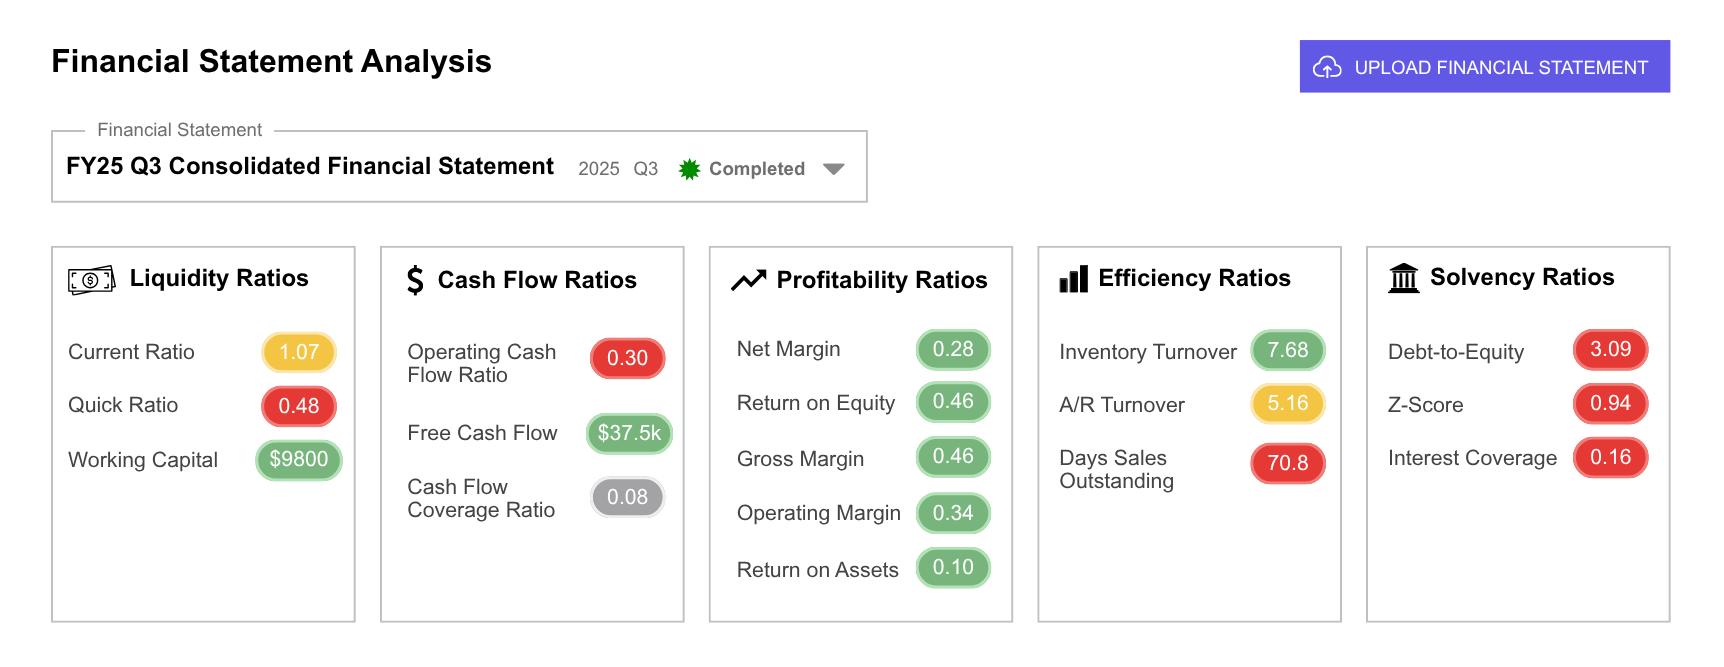
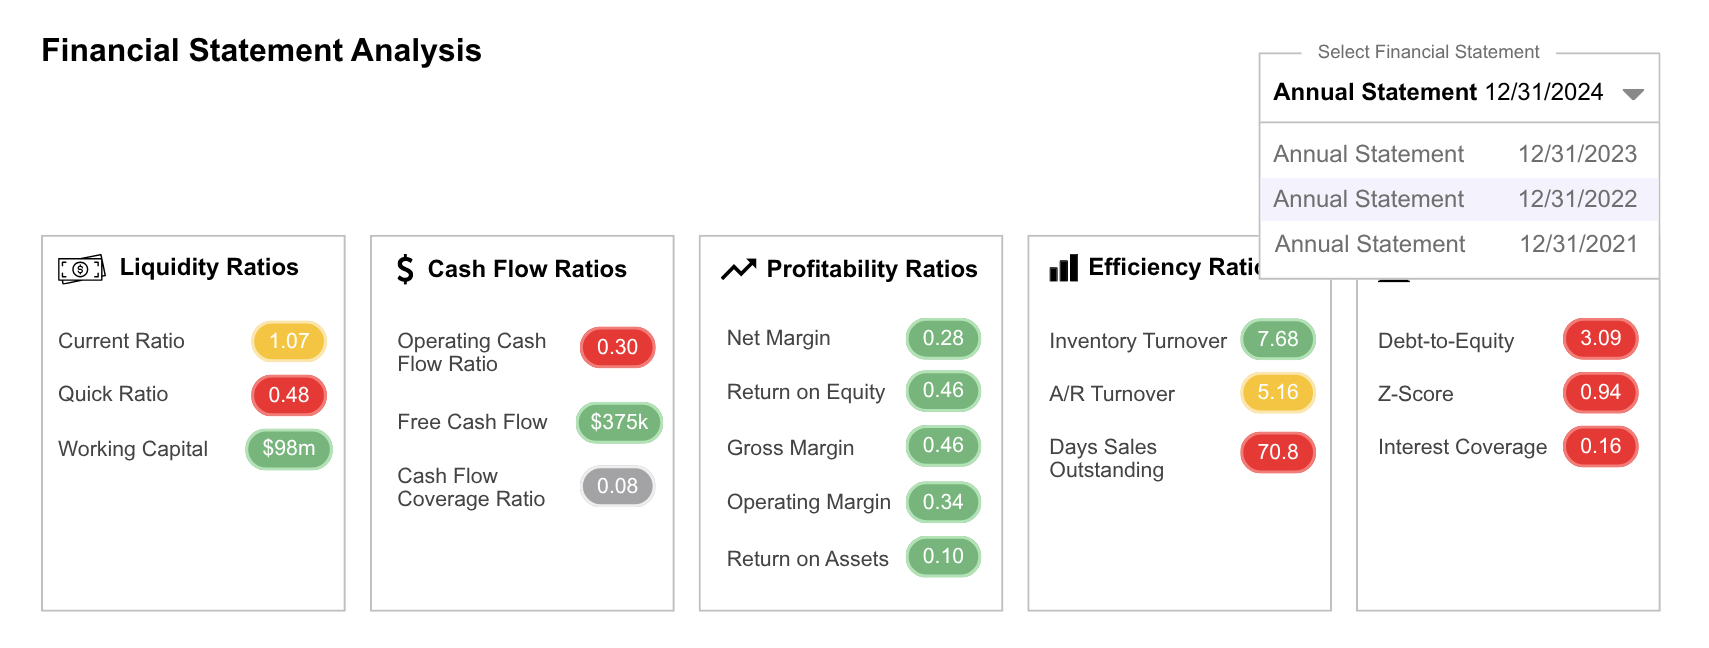
Once all fields are confirmed, your financial statement analysis will generate automatically. The dashboard displays key ratio categories including Liquidity, Cash Flow, Profitability, Efficiency, and Solvency.
Each ratio is color-coded to help you spot trends and outliers quickly.
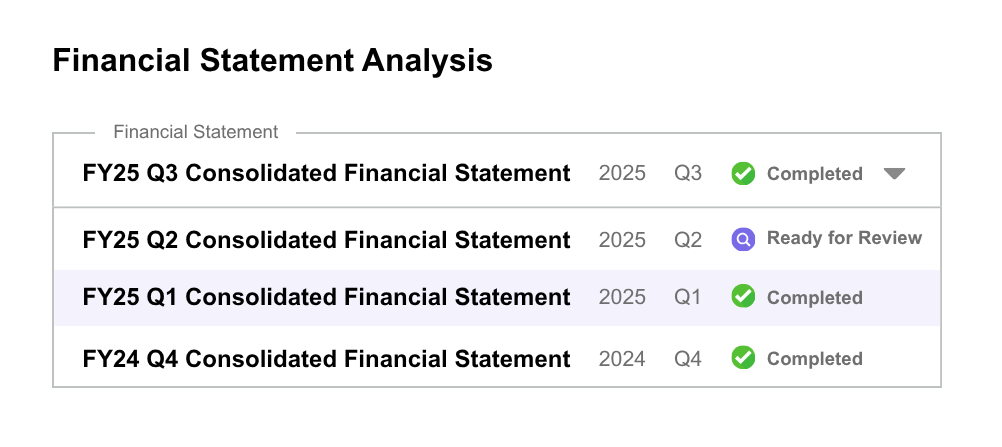
If you’ve uploaded multiple statements for the same customer, use the dropdown menu to switch between periods and compare performance over time.
Public Company Financials
Credit Pulse automatically collects public company financial data to help you analyze performance, track trends, and make informed credit decisions faster. You can easily view or compare annual financial statements we’ve already collected.
How It Works
Select a Statement: Use the dropdown to choose from prior years (for example, 2024, 2023, or 2022).
View Financial Analysis: Instantly access ratios across liquidity, profitability, efficiency, and cash flow categories.
Identify Key Changes: Compare multiple years to see shifts in margins, leverage, and overall health.
Questions?
Email support@creditpulse.com for assistance.