
Automated Decisioning
Automated Decisioning allows you to apply your credit policy consistently across every application and generate a recommended decision instantly.
Instead of manually reviewing each application from scratch, Credit Pulse evaluates the data against your policy and provides a structured recommendation your team can review, adjust, or approve.
How It Works
Automated Decisioning follows a simple flow.
You start by creating a credit policy that reflects how your team makes decisions. That policy is then automatically applied to incoming applications. Credit Pulse evaluates each application against your rules and generates a recommended decision, including limit, terms, and reasoning. From there, your team can review the recommendation and choose to approve it, adjust it, or reject it.
Pro-Tip: If you have not documented your policy or it's outdated, our Credit Policy Designer tool is free to use and can help you build or test your policy.
Step 1: Create Your Credit Policy
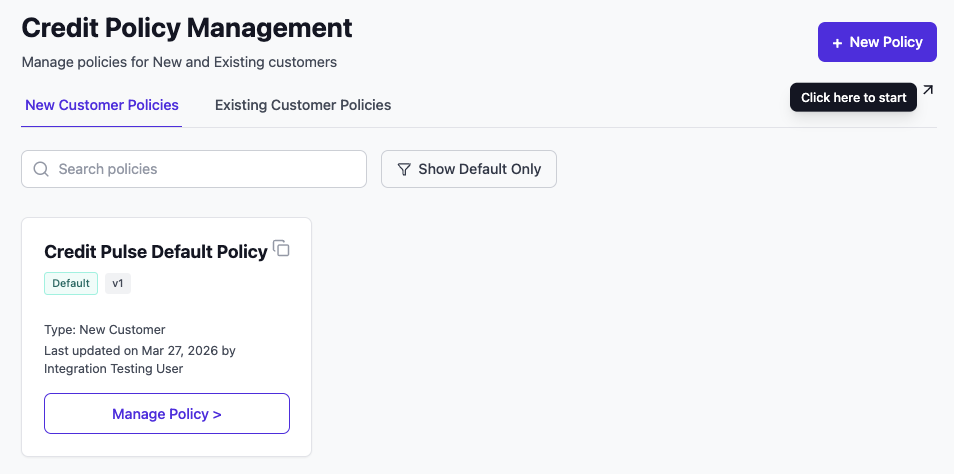
To get started, create a policy from the Credit Policy Management page.
Click New Policy, then enter a name and select whether the policy applies to new or existing customers. You can optionally add a version description and choose to start from the default policy as a baseline.
Once everything is set, click Next to move on to defining your policy content.
Notes:
Only one policy can be set as the default per type
Policies are versioned automatically as you make updates
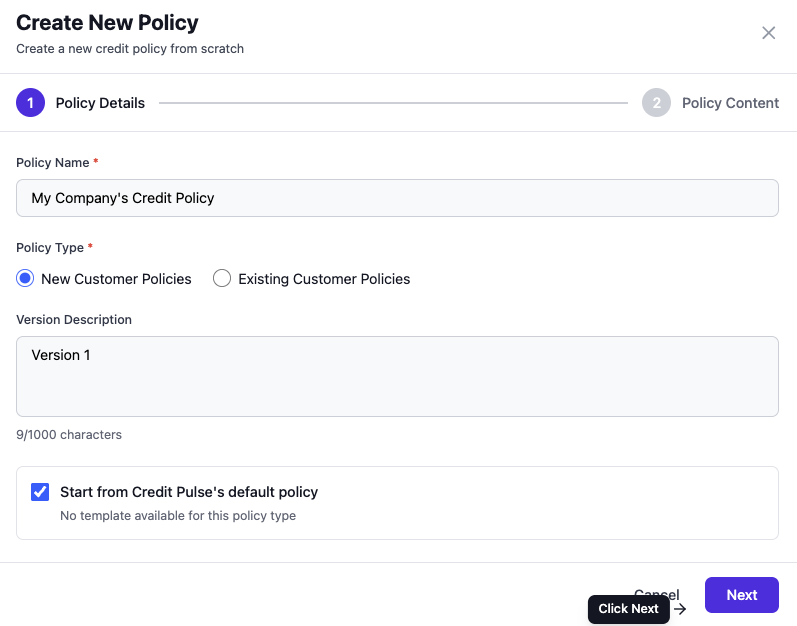
Step 2: Set Policy Details
After clicking New Policy, you’ll first define the basic setup for your policy.
Enter a name, choose whether the policy applies to new or existing customers, and add an optional version description. You can also choose to start from Credit Pulse’s default policy, which gives you a structured starting point.
Click Next to move on to defining the policy itself.
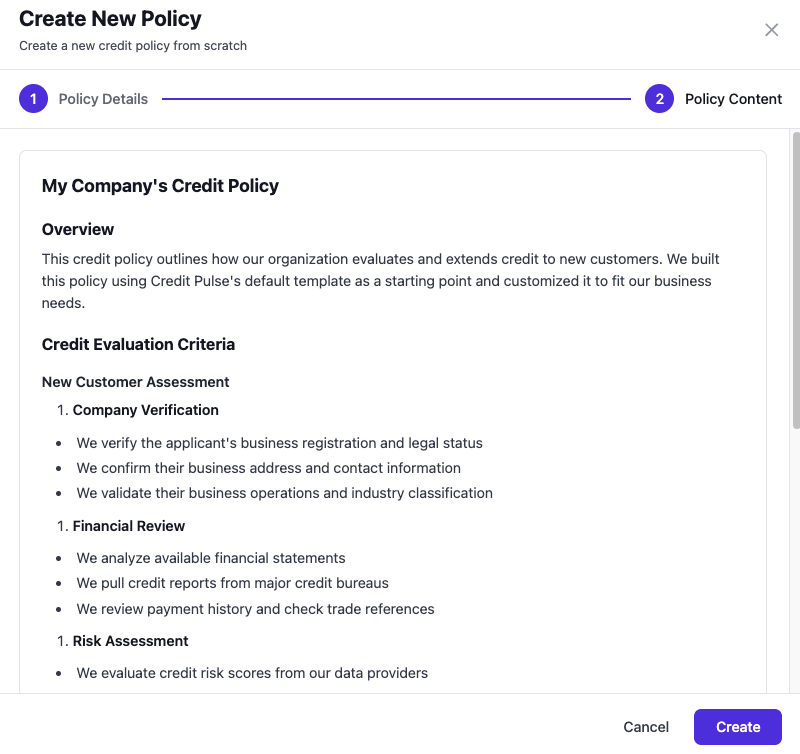
Step 3: Define Policy Content
This is where you define how decisions should be made.
You’ll outline the criteria your team uses to evaluate customers, such as verification steps, financial review, payment behavior, risk thresholds, and how credit limits and terms are determined.
You can edit and customize each section to match your current process or formalize a new one.
When complete, click Create to finalize the policy.
Step 3: Apply Your Policy
When you open a customer report with a submitted application (or one that hasn’t been reviewed yet), the policy is automatically applied.
Credit Pulse evaluates the application against your policy and generates a recommended decision.
You’ll see the full decision panel, including the recommended outcome, suggested credit limit, terms, and a reasoning summary.
From here, you can dig deeper into the details. You can view the policy used, review the full reasoning behind the decision, or open the original application to see what was submitted.
This is your starting point for taking action.
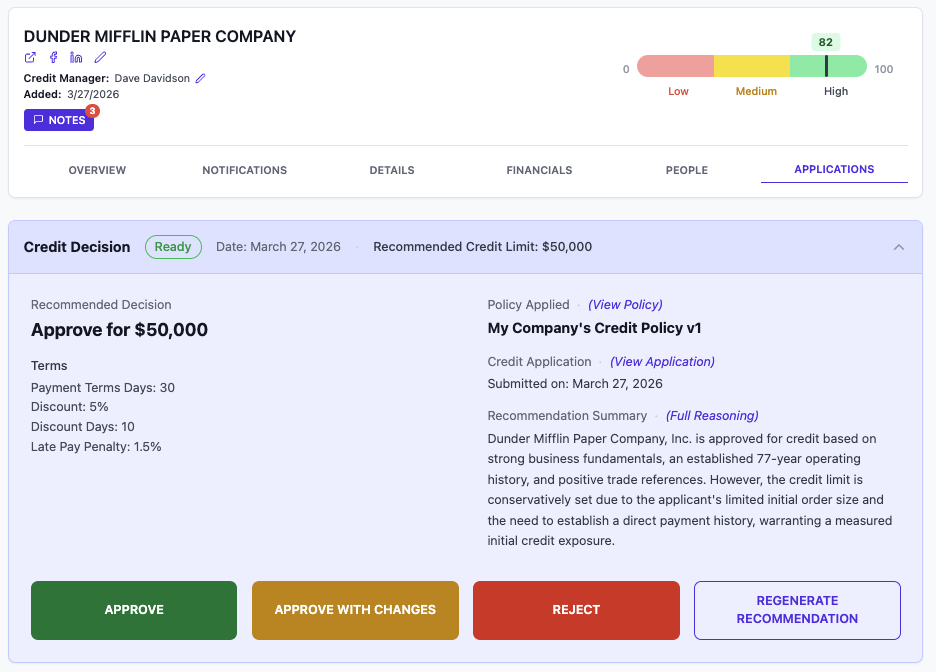
Step 4: Review & Decision
Once a recommendation is generated, you can review and take action.
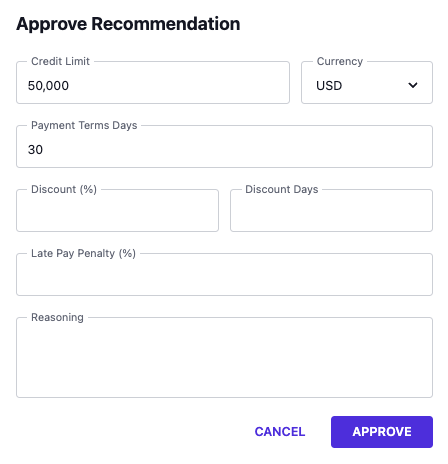
Approve
Click Approve to accept the recommendation as-is.
The recommended values (credit limit, terms, etc.) are pre-filled and locked to reflect your policy. You can add or update the reasoning before confirming.
Click Confirm Approval to finalize.
Approve with Changes
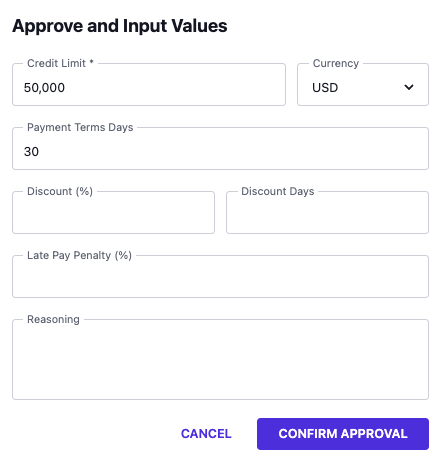
Click Approve with Changes if you need to adjust the decision.
All fields become editable, including:
Credit limit
Payment terms
Discounts and discount days
Late payment penalty
Update the values as needed, add reasoning, and click Confirm Approval.
Reject
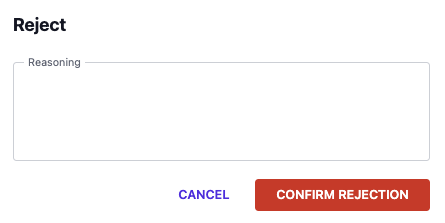
Click Reject to decline the application. Enter a reason for the decision, then click Confirm Rejection.
Regenerate Recommendation
Click Regenerate Recommendation to re-run the decision logic based on the latest data or updates.
Decision Output
Each decision captures the full context of what was approved and why.
This includes the final outcome (approved or rejected), the assigned credit limit and terms, the policy version used, and the complete reasoning behind the decision.
All decisions are automatically saved and tied directly to the application, creating a clear and traceable record.
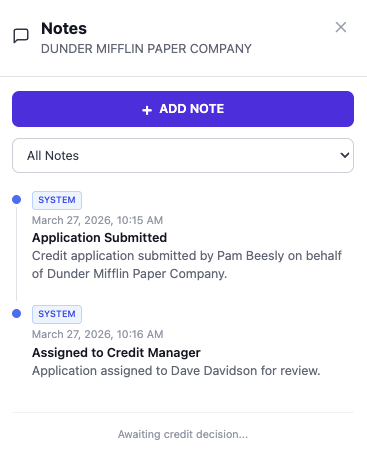
Notes and Activity Trail
Every application includes a built-in audit trail. The Notes tab will display a count when notes are present, making it easy to see when additional context exists.

Credit Pulse automatically logs key events as system notes, such as when an application is submitted, assigned, or updated. This creates a clear, time-stamped history of what happened and when.
You can also add your own notes to capture context, decisions, or internal discussions alongside the system activity.
Best Practices
Start with the default policy, then customize
Keep policy rules simple and measurable
Use Approve with Changes for edge cases
Require reasoning for overrides to maintain consistency
Review policy performance over time and version as needed
Questions? Email support@creditpulse.com for assistance.